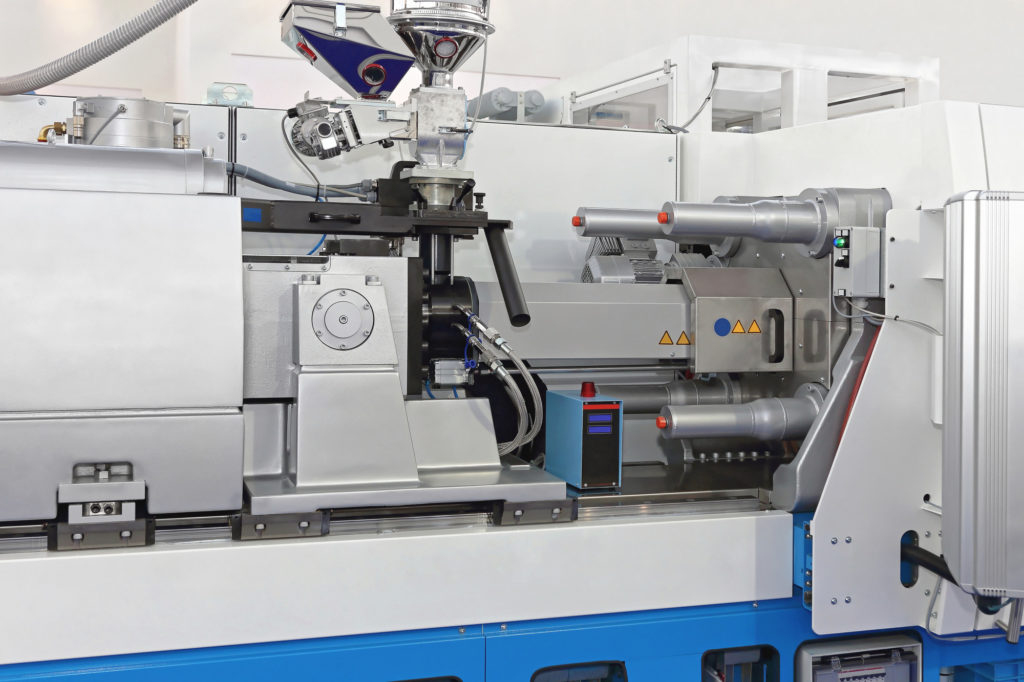
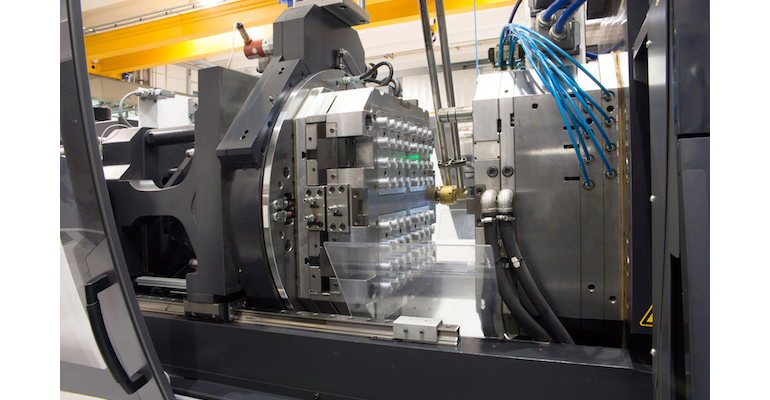
Introduction:
Injection moulding is a widely used manufacturing process for producing plastic parts and products. However, like any manufacturing process, it can be susceptible to defects that can affect the quality of the final product.
We Topgrid, have worked more than 50+ projects in injection moulding. During those project we have encountered and solved those injection moulding defects. In this blog post, we will explore some common injection moulding defects, their causes, and provide remedies and troubleshooting tips to help you address these issues effectively.
Types of Injection Moulding Defects:
Injection moulding defects can manifest in various ways, affecting the appearance, strength, and functionality of the final product.
Here are some common types of injection moulding defects:
- Sink Marks: Depressions on the surface of the part caused by uneven cooling.
- Warping: Distortion or bending of the part due to uneven cooling or excessive shrinkage.
- Flash: Excess material that extends beyond the part’s intended shape.
- Short Shots: Incomplete filling of the mould, resulting in a partially formed part.
- Knit Lines: Weak lines in the part where the melt front meets during filling.
- Jetting: Occurs when the molten material shoots out of the mould with high velocity.
- Blistering: Formation of bubbles or blisters on the part’s surface.
Causes of Injection Moulding Defects:
To effectively address moulding defects, it’s crucial to understand their root causes. Common causes include:
- Inadequate Material Flow: Insufficient or uneven distribution of molten material.
- Improper Injection Speed and Pressure: Incorrect settings can lead to defects.
- Mould Temperature: Variations in mould temperature can cause warping and other defects.
- Cooling Rate: Uneven cooling can result in sink marks and warping.
- Material Issues: Contaminated or degraded materials can lead to defects.
Injection Moulding Defects: Causes and Remedies:
1) Blisters – Injection Moulding Defects
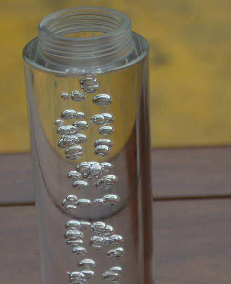
Causes: The formation of blisters in injection molding can be attributed to various factors, including:
- Presence of foreign objects or contamination within the mold.
- Mold temperature operating outside of the specified parameters.
- Improper vacuum conditions during the molding process.
- Deflection in the molding tool.
- A rapid increase in oven temperature during the heat-up phase.
Solutions: To address blisters in injection molding, consider implementing the following corrective actions:
- Conduct a thorough material inspection to ensure it is free from any contaminants.
- Adjust the mold temperature to the appropriate level.
- Set the vacuum conditions correctly.
- Inspect the mold for any signs of deflection.
- Additional techniques may include using a less reactive catalyst, optimizing material flow distance, fine-tuning mold temperatures, and adjusting curing times, among other strategies.
(2) Flow Lines – Injection Moulding Defects
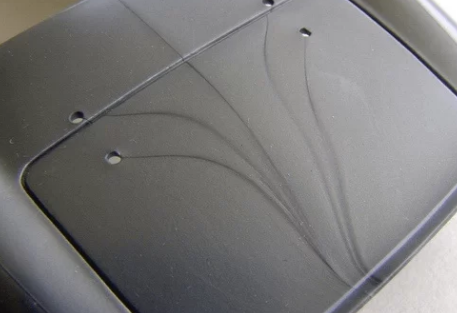
Flow Lines Causes: The presence of flow lines, which manifest as streaks, patterns, or lines in injection molding, can be attributed to several factors, including:
- Variations in cooling speed during the solidification process.
- Inconsistent flow rates of molten plastic within the mold.
- Molten plastic flowing through sections with varying wall thickness.
- Inadequate injection speed, which can lead to flow disruptions.
Flow Lines Solutions: To address flow lines in injection molding, consider the following corrective measures:
- Increase injection speed and pressure to promote smoother and more even material flow.
- Round the corners of the mold to minimize abrupt changes in flow direction and reduce the likelihood of flow lines forming.
(3) Burn Marks – Injection Moulding Defects
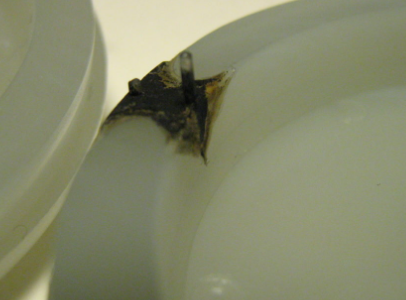
Burn Marks Causes: The occurrence of burn marks as defects in injection molding can be attributed to various factors, including:
- Overheating of the material due to prolonged residence time in the barrel or excessive temperature settings.
- Excessive injection speed or pressure causing material to degrade.
- Poor ventilation or trapped air within the mold leading to excessive heat buildup.
- The presence of contaminants, such as oil or moisture, in the material.
Burn Marks Solutions: To mitigate the issue of burn marks in injection molding, consider implementing the following corrective actions:
- Optimize temperature settings and residence time to prevent material overheating.
- Adjust injection speed and pressure to prevent material degradation.
- Ensure proper ventilation and venting of the mold to dissipate excess heat.
- Thoroughly inspect and ensure the purity of the material to eliminate contaminants.
(4) Drag Marks – Injection Moulding Defects
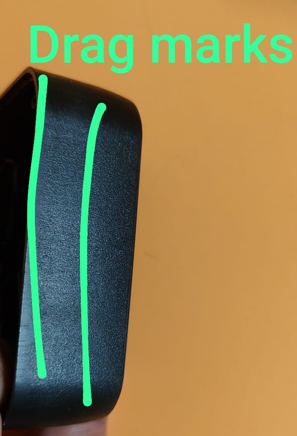
Drag lines in injection molding are defects that appear as thin, wavy lines on the surface of a molded part. They are caused by the material being dragged or pulled across the mold surface during the injection process.
Drag marks causes:
- Incorrect melt temperature: If the melt temperature is too low, the material will not flow easily and may be dragged across the mold surface.
- Incorrect injection pressure: If the injection pressure is too low, the material will not fill the mold cavity completely and may be dragged across the mold surface.
- Incorrect mold temperature: If the mold temperature is too low, the material will cool too quickly and may be dragged across the mold surface.
- Mold contamination: If the mold is contaminated with dirt, grease, or other materials, it can cause the material to drag across the mold surface.
- Mold design: If the mold is not designed properly, it can create areas where the material is more likely to drag.
Solutions
There are a number of things that can be done to reduce or eliminate drag lines in injection molding, including:
- Use the correct melt temperature: The melt temperature should be high enough to allow the material to flow easily, but low enough to prevent the material from burning.
- Use the correct injection pressure: The injection pressure should be high enough to fill the mold cavity completely, but low enough to prevent the material from being overpacked.
- Use the correct mold temperature: The mold temperature should be high enough to prevent the material from cooling too quickly, but low enough to prevent the material from burning.
- Keep the mold clean: The mold should be cleaned regularly to remove any dirt, grease, or other materials that could contaminate the material.
- Design the mold properly: The mold should be designed to minimize areas where the material is likely to drag.
(5) Part Deformation – Injection Moulding Defects
Causes: Part deformation in injection molding can occur due to a range of factors, including:
- Inadequate cooling time, causing the part to deform before it solidifies completely.
- Insufficient packing pressure, leading to incomplete filling and subsequent deformation.
- Variations in mold temperature, resulting in uneven cooling and warping of the part.
- Material-related issues, such as improper material selection or excessive moisture content, leading to deformation during the molding process.
Remedies: To address the problem of part deformation in injection molding, consider the following corrective actions:
- Extend the cooling time to ensure that the part solidifies properly and minimize deformation.
- Increase packing pressure to facilitate complete filling and reduce the likelihood of deformation.
- Maintain consistent and appropriate mold temperatures to ensure uniform cooling and prevent warping.
- Carefully select materials suited for the intended application and ensure they are free from moisture or other contaminants that can cause deformation.
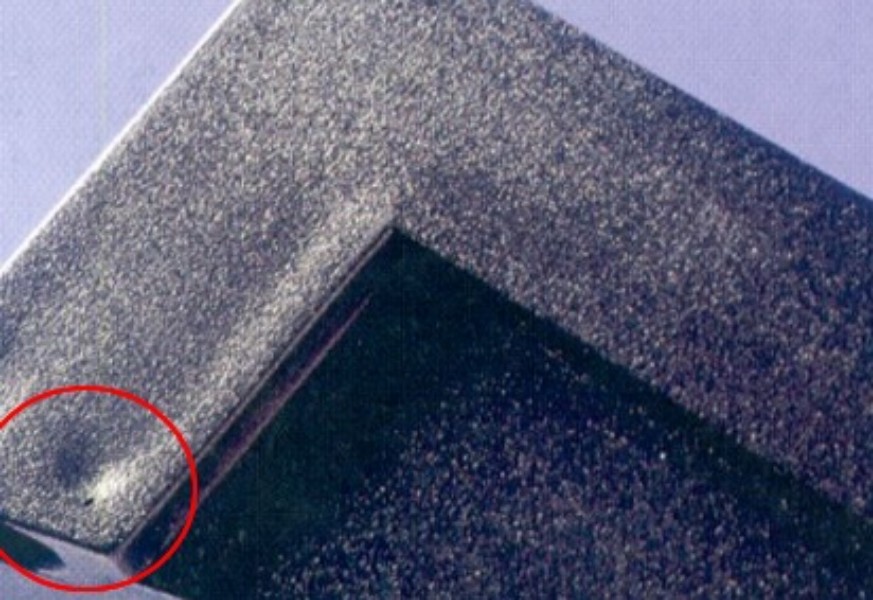
(6) Sink marks – Injection Moulding Defects

Causes: Sink marks, which appear as depressions or indentations on the surface of an injection-molded part, can be caused by several factors, including:
- Inadequate cooling time, resulting in uneven cooling and shrinkage.
- Variations in wall thickness within the part, causing differential cooling and warping.
- High melt viscosity of the material, leading to slow cooling and sink marks.
- Inadequate packing pressure during the molding process, causing the material to shrink prematurely.
Remedies: To address the issue of sink marks in injection molding, consider implementing the following corrective measures:
- Extend the cooling time to allow the part to solidify more uniformly and reduce the likelihood of sink marks.
- Ensure consistent wall thickness within the part to promote even cooling and minimize differential shrinkage.
- Opt for materials with lower melt viscosity, which cool more rapidly and are less prone to sink marks.
- Increase packing pressure during the molding process to mitigate premature material shrinkage and the formation of sink marks.
(7) Flash – Injection Moulding Defects
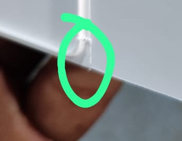
Causes: Flash in injection molding refers to the excess material that escapes from the mold parting line, resulting in unwanted thin fins or excess plastic.
It can occur due to several reasons, including:
- Inadequate clamping force, allowing material to escape from the mold.
- Insufficient or improper mold design and construction.
- Excessive injection pressure or speed.
- Wear and tear on the mold or poor mold maintenance.
- High mold temperature, leading to material leakage.
Remedies: To address the issue of flash in injection molding, consider implementing the following corrective measures:
- Increase clamping force to ensure the mold remains closed securely.
- Review and improve the mold design and construction, paying attention to parting lines and mold alignment.
- Optimize injection pressure and speed settings to prevent excess material from escaping.
- Regularly maintain and repair molds to minimize wear and tear.
- Adjust the mold temperature to reduce the risk of material leakage.
(8) Knit Lines – Injection Moulding Defects
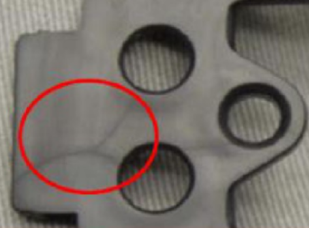
Causes: Knit lines in injection molding, also known as weld lines, are lines or marks where two flow fronts of molten plastic meet and rejoin, often resulting in reduced part strength and appearance issues.
Knit lines can occur due to various factors, including:
- Complex part geometry leading to multiple flow fronts converging.
- Insufficient material temperature, viscosity, or injection pressure.
- Material variations, such as different colors or additives.
- Mold design, gate positioning, or insufficient venting.
- High melt flow index materials that can result in poor fusion.
Remedies: To address the issue of knit lines in injection molding, consider implementing the following corrective measures:
- Simplify part geometry to minimize the formation of multiple flow fronts.
- Increase material temperature, viscosity, and injection pressure to facilitate better fusion at the flow fronts.
- Ensure uniformity in material composition, especially when using colorants or additives.
- Optimize mold design and gate positioning to encourage flow front fusion, and ensure proper venting within the mold.
- Consider materials with lower melt flow indices to promote better fusion at the knit lines.
(9) Jetting – Injection Moulding Defects

Causes: Jetting in injection molding refers to the formation of visible streaks or jets of molten plastic as it enters the mold cavity. It can occur due to several factors, including:
- High injection speeds, causing the material to shoot into the mold cavity with excessive force.
- Narrow gate or nozzle openings, leading to a higher likelihood of jetting.
- Insufficient melt temperature, viscosity, or pressure, preventing the material from flowing smoothly into the mold.
- Mold design issues, such as poor venting or gating arrangements.
Remedies: To address the issue of jetting in injection molding, consider implementing the following corrective measures:
- Reduce injection speeds to prevent excessive material pressure and the formation of jets.
- Opt for wider gate or nozzle openings to allow for a smoother material flow into the mold.
- Increase material temperature, viscosity, and injection pressure to facilitate better flow and reduce jetting.
- Improve mold design, focusing on proper venting and gating arrangements to ensure a more controlled and uniform material flow.
Troubleshooting Injection Moulding Defects:
To effectively troubleshoot injection moulding defects, consider the following steps:
- Conduct a thorough process analysis.
- Monitor and adjust machine parameters.
- Inspect the mould for damage or wear.
- Review material quality and consistency.
- Collaborate with experienced moulding technicians.
Conclusion:
Understanding and addressing common injection moulding defects is essential for producing high-quality plastic parts and products. By identifying the causes and applying appropriate remedies and troubleshooting techniques, manufacturers can minimize defects, reduce production costs, and enhance product quality.